Gamma_step_pin 2.2 # Pin for gamma stepper step signal # Pins are defined as ports, and pin numbers, appending "!" to the number will invert a pinĪlpha_step_pin 2.0 # Pin for alpha stepper step signalĪlpha_dir_pin 0.5 # Pin for alpha stepper directionĪlpha_en_pin 2.4! #0.4 # Pin for alpha enable pinĪlpha_current 1.5 # X stepper motor currentīeta_step_pin 2.1 # Pin for beta stepper step signalīeta_dir_pin 0.11 # Pin for beta stepper directionīeta_en_pin 2.4! #0.10 # Pin for beta enableīeta_current 1.5 # Y stepper motor current


Z_axis_max_speed 300 # Maximum speed in mm/min Y_axis_max_speed 30000 # Maximum speed in mm/min X_axis_max_speed 30000 # Maximum speed in mm/min #z_junction_deviation 0.0 # For Z only moves, -1 uses junction_deviation, zero disables junction_deviation on z moves DO NOT SET ON A DELTA #z_acceleration 500 # Acceleration for Z only moves in mm/s^2, 0 uses acceleration which is the default. # Planner module configuration : Look-ahead and acceleration configurationĪcceleration 3000 # Acceleration in mm/second/second. Gamma_steps_per_mm 160 # Steps per mm for gamma stepper Translates mm positions into stepper positionsĪlpha_steps_per_mm 160 # Steps per mm for alpha stepperīeta_steps_per_mm 160 # Steps per mm for beta stepper # Arm solution configuration : Cartesian robot. # if both are used, will use largest segment length based on radius # note it is invalid for both the above be 0 Mm_max_arc_error 0.01 # The maximum error for line segments that divide arcs 0 to disable #mm_per_line_segment 5 # Cut lines into segments this size Mm_per_arc_segment 0.0 # Fixed length for line segments that divide arcs, 0 to disable # Robot module configurations : general handling of movement G-codes and slicing into movesĭefault_feed_rate 4000 # Default speed (mm/minute) for G1/G2/G3 movesĭefault_seek_rate 4000 # Default speed (mm/minute) for G0 moves # NOTE Lines must not exceed 132 characters, and '#' characters mean what follows is ignored This results in the axis set to X180.00, Y0.00 and Z180.10 due to the 4.90mm offset when callibrating. This writes the setting in the config-override file M500 #Store new zero location permanently (M500). MOVE NOZZLE DOWN GRADUALLY TO ALLOW PAPER TO FIT UNDER G1 X90 Y90 Z10 #Move nozzle to middle of plate at 10mm above zero I then calibrate the Z axis using a piece of paper under the nozzle in the center of the build plate using the following GCode: G28 #Home all axis My Smoothieware settings are down the bottom of the page - note gamma_max of 185. I'm a bit surprised there isn't more info on the TinyFab support site to allow a new user to get started. I'm so stuck and would appreciate any assistance. Cura and the Cetus3D but I am not sure if they involve the TinyFab CPU or if they are just for printing GCode in UpStudio as most of the posts are over a year old now. I am totally willing to experiment to get print quality to match / exceed what I was getting in Up Studio but I am having a lot of difficulty getting started. I am at the stage of trying to get a 20mm cube printed and have decided to use Cura for slicing and producing the G-Code and then issuing the GCode via Repetier-Host which I think TinyFab himself uses. I have now spent days getting the BLTouch installed and 3 point leveling working.

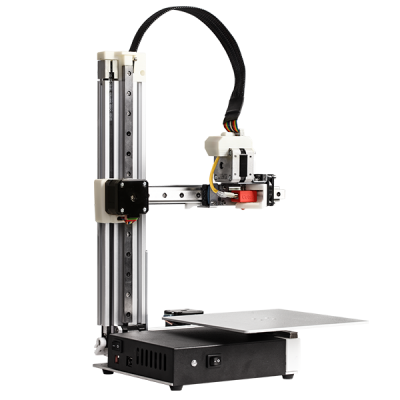
I have my Cetus3D MkII with TinyFab CPU installed. First of all, apologies for the massive post.


 0 kommentar(er)
